훕포메이션 서비스를 이제 카카오톡 채널을 오픈빌더 스킬서버로 이전하면서
Spring Boot로 스택을 변경하게되었다.
매번 Json으로 덕지덕지 작성하는 게 싫어서 Kakao i 스킬 API Wrapper Library를 만들었다.
2019 회고와 Wrapper Library 개발기는 이후로 미루고 먼저 Wrapper Library 등록하기에 대해 포스팅해본다.
먼저 Maven 프로젝트를 생성한다.
아래 사진과 같이 두고 Next를 눌러 생성한다.

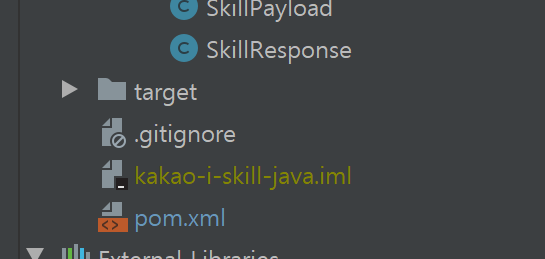
프로젝트가 생성되면
루트 디렉토리에 pom.xml 파일이 있는 것을 확인할 수 있다.
pom.xml 에서
<groupId>com.github.roharon</groupId>
<artifactId>kakao-i-skill</artifactId>
<version>0.1</version>
위와 같이 groupId, artifactId, version을 설정해준다
groupId는 도메인이 있다면 해당 도메인으로(aaronroh.org 라면 org.aaronroh.
~
) 설정하고
없다면, com.github.<유저네임> 또는 io.github.<유저네임> 으로 지정하자
이렇게 하지 않으면 중앙 저장소 관리를 하는 sonatype에 라이브러리 등록할 때 관리자에게 변경하라는 커멘트를 받게 된다.
    <developers>
        <developer>
            <name>roharon</name>
            <email>roharon98@gmail.com</email>
        </developer>
    </developers>
이와 같은 설정도 하게 되는데 처음 pom.xml을 접하면 설정하는 부분도 많아 헷갈릴 것이다.
따라서 아래에 나의 pom.xml 전체를 첨부한다
<?xml version="1.0" encoding="UTF-8"?>
<project xmlns="http://maven.apache.org/POM/4.0.0"
         xmlns:xsi="http://www.w3.org/2001/XMLSchema-instance"
         xsi:schemaLocation="http://maven.apache.org/POM/4.0.0 http://maven.apache.org/xsd/maven-4.0.0.xsd">
    <modelVersion>4.0.0</modelVersion>

        <groupId>com.github.roharon</groupId>
    <artifactId>kakao-i-skill</artifactId>
    <version>0.1</version>
    <packaging>jar</packaging>

    <name>kakao-i-skill</name>
    <description>kakao i skill API Wrapper</description>
    <url>https://github.com/roharon/kakao-i-skill-java</url>

    <licenses>
        <license>
            <name>MIT License</name>
            <url>http://www.opensource.org/licenses/mit-license.php</url>
            <distribution>repo</distribution>
        </license>
    </licenses>

    <developers>
        <developer>
            <name>roharon</name>
            <email>roharon98@gmail.com</email>
        </developer>
    </developers>

    <scm>
        <url>https://github.com/roharon/kakao-i-skill-java</url>
    </scm>

    <distributionManagement>
        <snapshotRepository>
            <id>ossrh</id>
            <url>https://oss.sonatype.org/content/repositories/snapshots</url>
        </snapshotRepository>
        <repository>
            <id>ossrh</id>
            <url>https://oss.sonatype.org/service/local/staging/deploy/maven2/</url>
        </repository>
    </distributionManagement>

    <properties>
        <java.version>1.8</java.version>
        <project.build.sourceEncoding>UTF-8</project.build.sourceEncoding>
    </properties>

    <build>
        <plugins>
            <plugin>
                <groupId>org.apache.maven.plugins</groupId>
                <artifactId>maven-compiler-plugin</artifactId>
                <configuration>
                    <source>1.8</source>
                    <target>1.8</target>
                </configuration>
            </plugin>
            <plugin>
                <groupId>org.apache.maven.plugins</groupId>
                <artifactId>maven-jar-plugin</artifactId>
                <version>2.3.2</version>
            </plugin>
            <plugin>
                <groupId>org.apache.maven.plugins</groupId>
                <artifactId>maven-source-plugin</artifactId>
                <version>2.3</version>
                <executions>
                    <execution>
                        <id>attach-sources</id>
                        <phase>verify</phase>
                        <goals>
                            <goal>jar</goal>
                        </goals>
                    </execution>
                </executions>
            </plugin>
            <plugin>
                <groupId>org.apache.maven.plugins</groupId>
                <artifactId>maven-javadoc-plugin</artifactId>
                <version>2.9.1</version>
                <executions>
                    <execution>
                        <id>attach-javadocs</id>
                        <phase>verify</phase>
                        <goals>
                            <goal>jar</goal>
                        </goals>
                    </execution>
                </executions>
            </plugin>

            <plugin>
                <groupId>org.apache.maven.plugins</groupId>
                <artifactId>maven-gpg-plugin</artifactId>
                <version>1.4</version>
                <executions>
                    <execution>
                        <id>sign-artifacts</id>
                        <phase>verify</phase>
                        <goals>
                            <goal>sign</goal>
                        </goals>
                    </execution>
                </executions>
            </plugin>

            <!-- GPG sign -->

        </plugins>
    </build>

    <dependencies>
    </dependencies>
</project>
그중에서 설명을 덧붙여보자면 아래의 distributionManagement 부분이
oss.sonatype.org 에 올리게 해주는 역할을 한다.
sonatype은 뒤에서 다루게 된다. 먼저 추가를 해주자
<distributionManagement>
    <snapshotRepository>
        <id>ossrh</id>
        <url>https://oss.sonatype.org/content/repositories/snapshots</url>
    </snapshotRepository>
    <repository>
        <id>ossrh</id>
        <url>https://oss.sonatype.org/service/local/staging/deploy/maven2/</url>
        </repository>
</distributionManagement>
이제 sonatype에 등록을 해볼 것이다.
https://issues.sonatype.org/projects/OSSRH 에 접속한다.

Group Id, Project Url, SCM Url, Username 을 입력한다.
pom.xml 에서 입력한 Group Id 을 입력하고, Project Url은 https://github.com/roharon/kakao-i-skill-java 이와 같이
SCM Url 은 https://github.com/roharon/kakao-i-skill-java.git 와 같이 입력한다
Username은 Github 의 유저네임을 입력하면 된다.
3~4시간 기다리면 대부분 관리자가 커멘트를 남긴다.
자신이 이슈를 잘 등록한 건지 궁금할 수 있다. 아래와 같이 나오면 잘 된 것이다.

com.roharon.~~ 로 Group Id 등록을 하면 Github page로 리다이렉트를 하거나 TXT레코드 추가를 통해 본인인증을 한다.
도메인이 없다면 com.github.유저네임 으로 하면 된다
이 경우엔 특정 티켓이름(예:OSSRH-54214)을 가진 레포지토리를 생성하라고 한다.
이제 별 문제가 없다면 이슈 상태에 resolved(해결됨)로 뜨는 것을 확인할 수 있다
Central sync is activated for com.github.roharon.
또는 이와 같이 활성화됨을 볼 수 있다.
그리고 Ubuntu 기준에서maven과 gnugp 설치가 필요하다
$ apt-get install maven
$ apt-get install gnupg
이제 maven의 settings.xml 을 수정할 것이다.
pom.xml 에서 수정해도 되지만 그러면 자신 gpg의 passPhrase가 공개될 것이다
/usr/share/maven/conf 의 경로에서 settings.xml을 찾는다.
없다면 $HOME/.m2/ 경로에서 찾는다.
이제 이곳에 sonatype issue (JIRA 사이트 등록할 때 사용한 유저네임, 비밀번호를 적을 것이다.
<servers>
    <server>
        <id>ossrh</id>
        <username>OSSRH 유저네임</username>
        <password>OSSRH 비밀번호</password>
        <configuration>
        </configuration>
    </server>
</servers>
이제 gpg Key를 생성하자
gnupg를 설치한 이유가 바로 gpg Key생성을 위함이다.
$ gpg --gen-key 사용자의 Real name, email을 입력받을 것이다.
입력을 해주고 passPhrase에서는 주의할 점이 있다.
되도록 10자 이상의 알파벳, 숫자로 이루어진 패스워드를 지정해주자
특수기호를 넣는 바람에 나중에 비밀번호가 일치하지 않다고 떠 삽질을 하였다.
생성이 잘 되었는지 확인하려면
$ gpg --list-keys를 통해서 확인한다.
$ gpg --list-keys --keyid-format LONG이 옵션을 통해서는 key id까지 확인할 수 있게 된다.
이제, gpg public key를
http://pgp.mit.edu/ 혹은 http://pool.sks-keyservers.net/ 에 등록한다.
gpg public key는 어떻게 알까?
gpg --armor --export (gpg키 생성시 입력한 이메일) > mykey.asc
#예 gpg --armor --export roharon98@gmail.com > mykey.asc
이와 같이 export를 하여 mykey.asc를 열어 확인해본다

sks-keyserver에 들어갔다면 위 화면에 붙여 넣거나

pgp.mit.edu에 들어갔다면 위의 화면에 public key를 붙여 넣어 등록해주자
이제 막바지에 이르렀다.
프로젝트 폴더에서
$ mvn clean deploy을 통해 deploy 작업을 한다.
이때 pom.xml 에 추가된 플러그인들이 동작하고 그중에서도 maven-gpg-plugin 플러그인이 passPhrase를 묻고 *.asc 파일을 생성할 것이다.

위 화면과 같이 GPG PassPhrase에 GPG KEY 생성할 때 입력한 패스워드를 입력한다.
(* 이 자꾸 거슬리게 뜰 텐데 무시해도 된다)
자 이제 한 단계만 더 남았다

마지막으로
https://oss.sonatype.org 에 들어가서 Release 작업을 할 것이다.
들어가서 로그인을 하고
좌측에 있는 Staging Repositories 를 누른다

위 화면처럼 뜨면 해당하는 Repository를 체크하고 Close를 누른다

Confirm을 누르고,

Release 를 누르면 된다.
이제 몇 시간 뒤에 http://search.maven.org 에서 검색을 할 수 있게 된다.
이로써 Maven 라이브러리 등록하기를 마쳤다.
참고자료
https://blog.geun.kr/83
https://www.lesstif.com/pages/viewpage.action?pageId=30277671
https://access.redhat.com/documentation/en-US/Red_Hat_Enterprise_Linux/4/html/Step_by_Step_Guide/s1-gnupg-export.html
댓글